
1
Read the given statements and conclusions carefully. Assuming that the information given in the statements is true, even if it appears to be at variance with commonly known facts, decide which of the given conclusions logically follow(s) from the statements.
Statements:
Some words are paragraphs.
All paragraphs are essays.
No essay is a story.
Conclusions:
(I): Some paragraphs are stories.
(II): All words are essay.
- A.Both conclusions (I) and (II) follow.
- B.Neither conclusion (I) nor (II) follows.
- C.Only conclusion (II) follows.
- D.Only conclusion (I) follows.
Solution
Syllogism
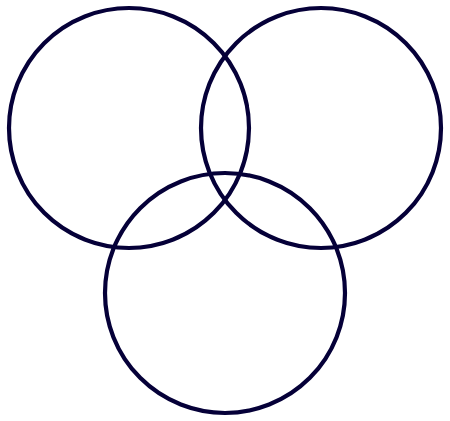
Put all three statements into one figure: the Words circle cuts the Paragraphs circle, the Paragraphs circle lies wholly inside Essays, and the Stories circle stays completely outside Essays.
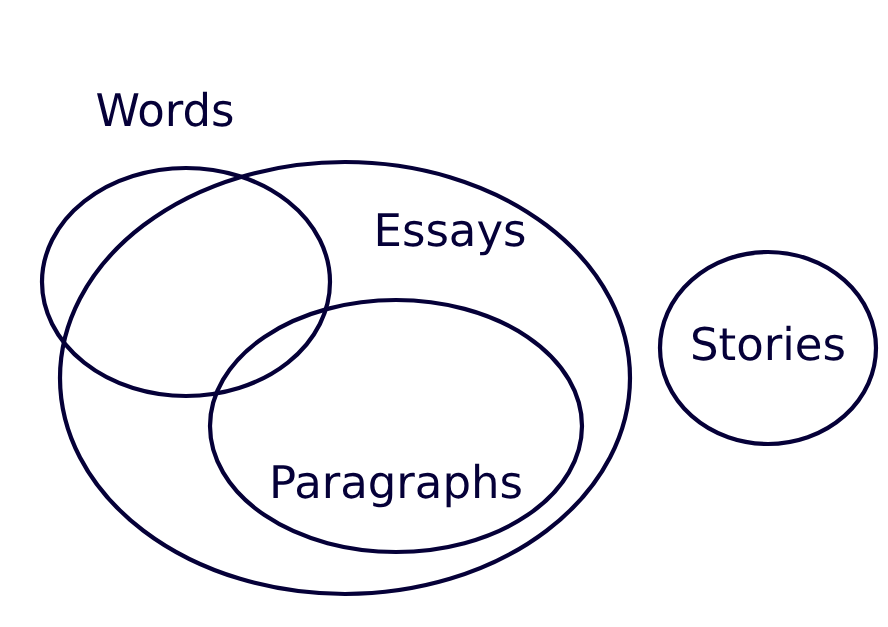 Conclusion (I): every paragraph is an essay and no essay is a story, so no paragraph can be a story. (I) does not follow.
Conclusion (II): only some words are paragraphs, so the remaining words may lie outside the Essays circle altogether. (II) does not follow.
Neither conclusion follows, so option (b) is correct.
Conclusion (I): every paragraph is an essay and no essay is a story, so no paragraph can be a story. (I) does not follow.
Conclusion (II): only some words are paragraphs, so the remaining words may lie outside the Essays circle altogether. (II) does not follow.
Neither conclusion follows, so option (b) is correct.
Conclusion (I): every paragraph is an essay and no essay is a story, so no paragraph can be a story. (I) does not follow.
Conclusion (II): only some words are paragraphs, so the remaining words may lie outside the Essays circle altogether. (II) does not follow.
Neither conclusion follows, so option (b) is correct.
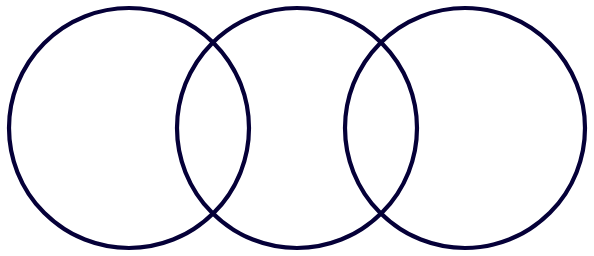
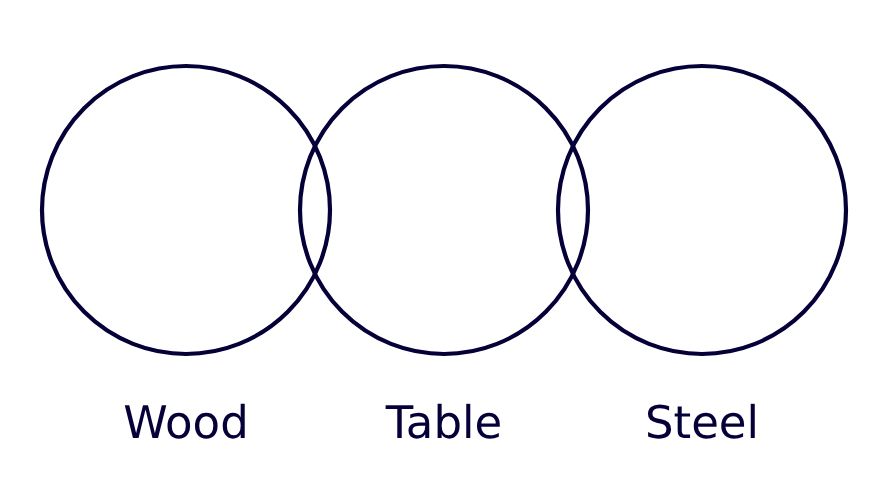 Only a chain of three circles shows all three facts at once: Wood cuts Table, Table cuts Steel, and Wood never touches Steel.
That is exactly option (b), so option (b) is correct.
Only a chain of three circles shows all three facts at once: Wood cuts Table, Table cuts Steel, and Wood never touches Steel.
That is exactly option (b), so option (b) is correct.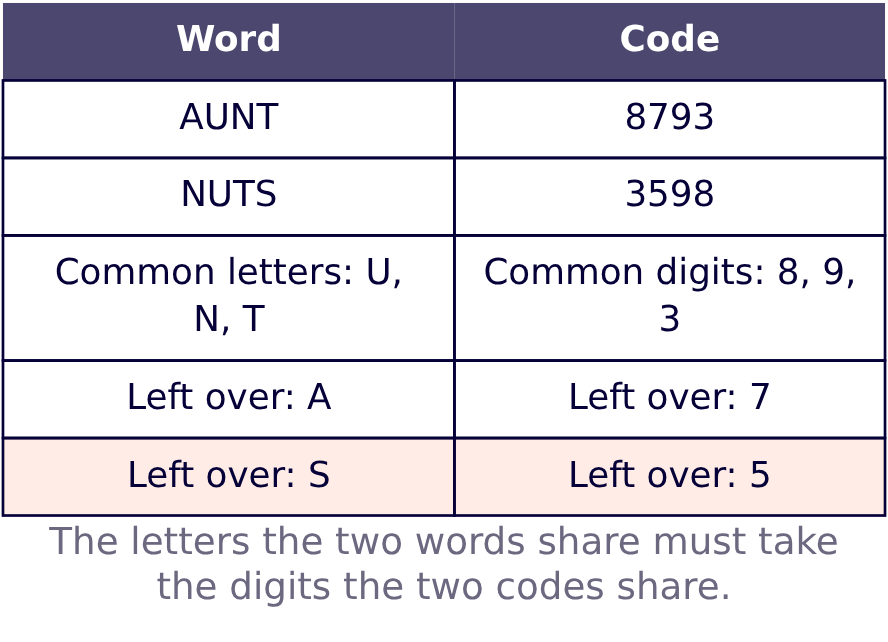 In AUNT the only letter left over is A and the only digit left over is 7, so A = 7.
In NUTS the only letter left over is S and the only digit left over is 5, so S = 5.
The code for S is therefore 5, so option (c) is correct.
In AUNT the only letter left over is A and the only digit left over is 7, so A = 7.
In NUTS the only letter left over is S and the only digit left over is 5, so S = 5.
The code for S is therefore 5, so option (c) is correct.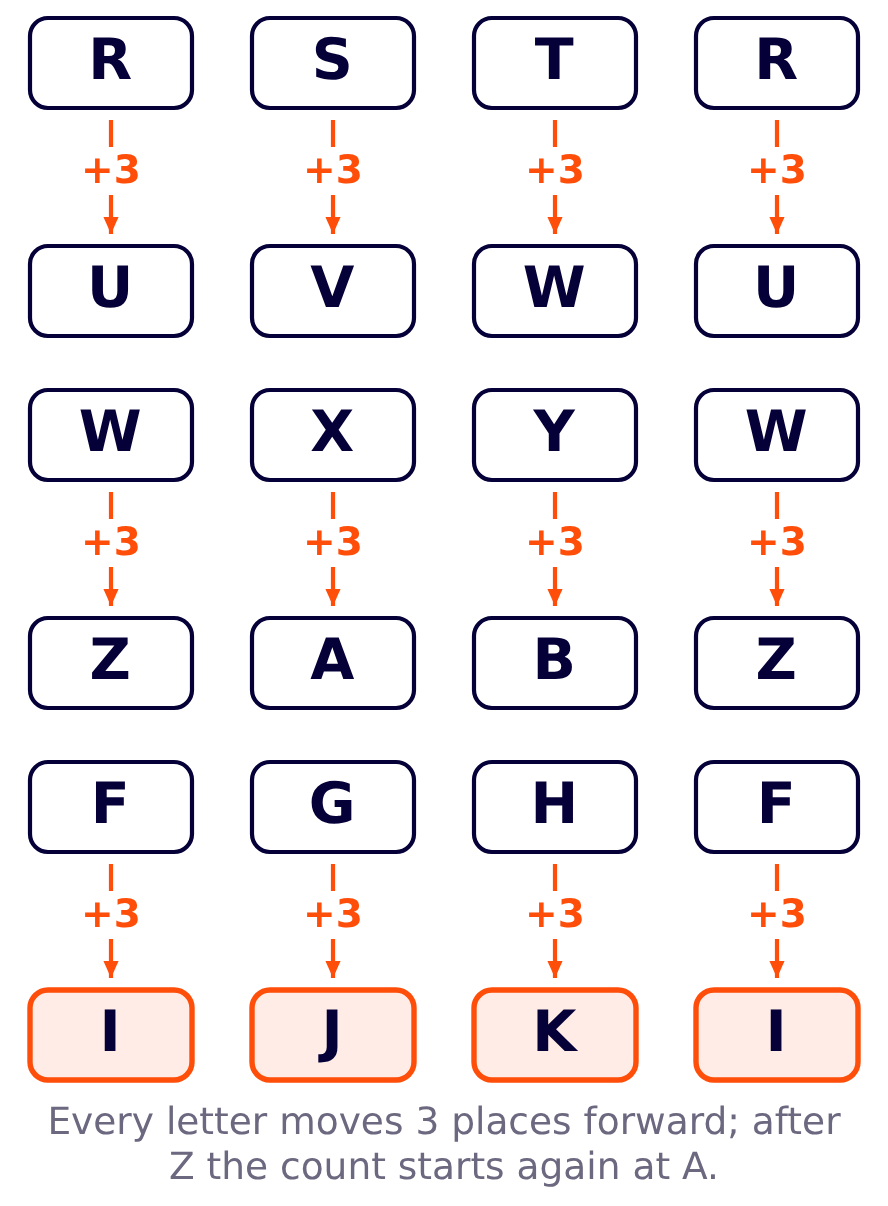 Applying +3 to FGHF gives F → I, G → J, H → K, F → I, that is IJKI, so option (c) is correct.
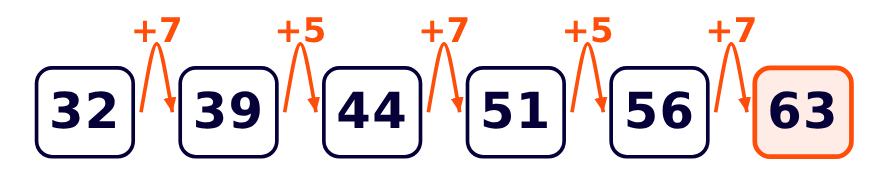 Hence the missing term is 56+7=63, so option (d) is correct.
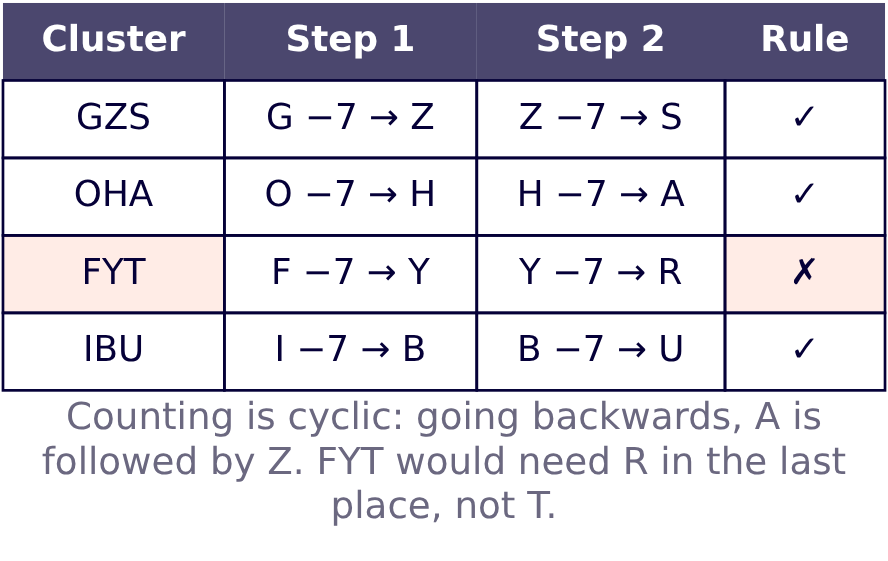 FYT is the only cluster that breaks the rule, so option (c) is correct.
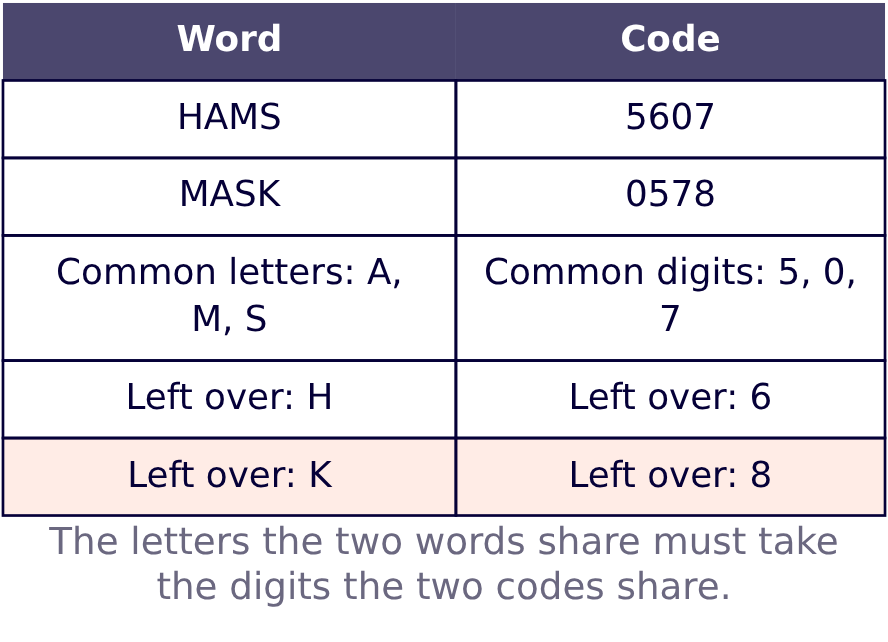 In HAMS the only letter left over is H and the only digit left over is 6, so H = 6.
In MASK the only letter left over is K and the only digit left over is 8, so K = 8.
The code for K is therefore 8, so option (c) is correct.
In HAMS the only letter left over is H and the only digit left over is 6, so H = 6.
In MASK the only letter left over is K and the only digit left over is 8, so K = 8.
The code for K is therefore 8, so option (c) is correct.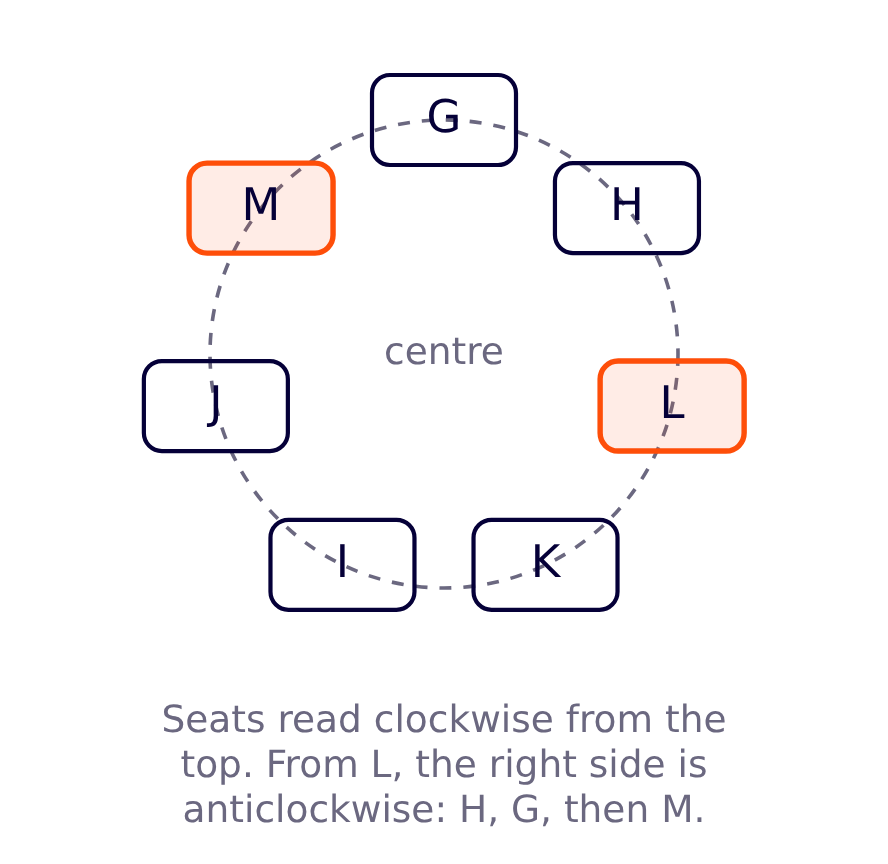 Counting from L towards L's right, that is anticlockwise, we meet H, then G, then M, so two people sit between L and M and option (a) is correct.
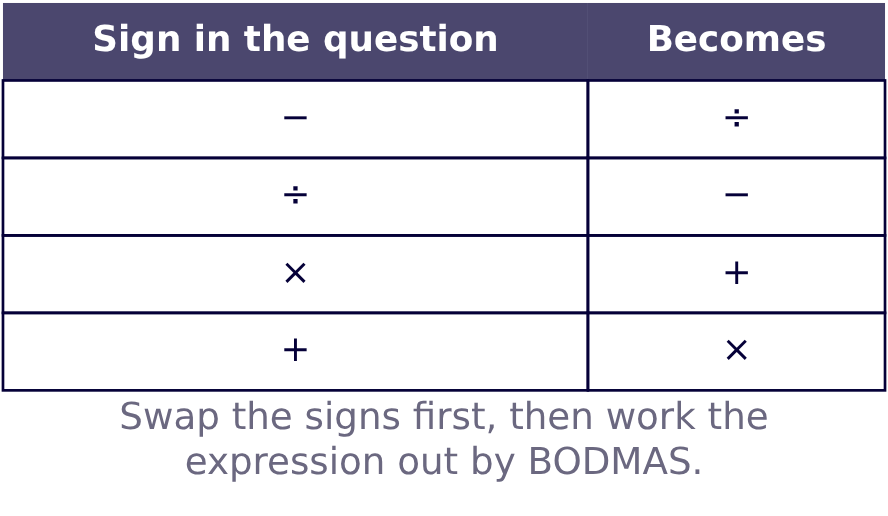 So turns into .
By BODMAS the multiplication and the division come first: .
.
Now the addition and the subtraction: 76+8-6=78.
The value in place of the question mark is 78, so option (b) is correct.
So turns into .
By BODMAS the multiplication and the division come first: .
.
Now the addition and the subtraction: 76+8-6=78.
The value in place of the question mark is 78, so option (b) is correct.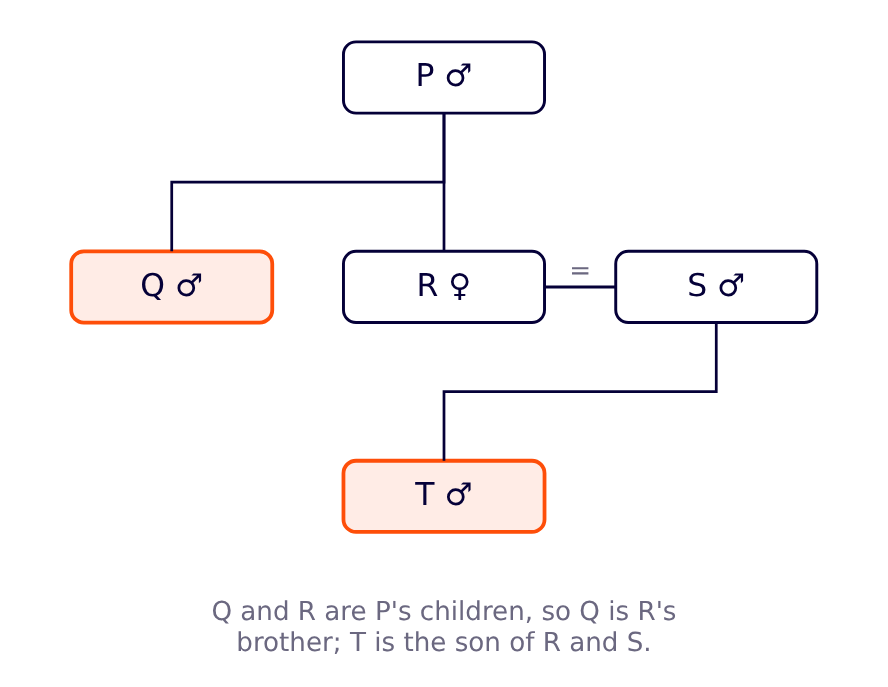 Q is therefore the brother of T's mother, that is T's mother's brother, so option (b) is correct.
He cannot be T's brother, because Q belongs to R's generation and T to the next one.
Q is therefore the brother of T's mother, that is T's mother's brother, so option (b) is correct.
He cannot be T's brother, because Q belongs to R's generation and T to the next one.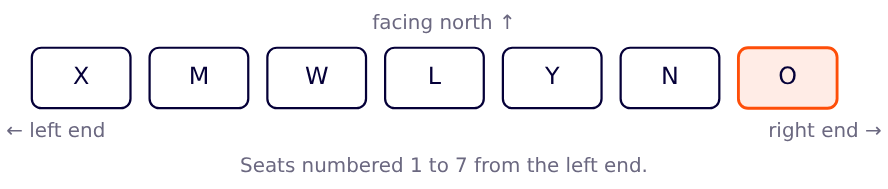 The row reads X, M, W, L, Y, N, O, so O sits at the right-most end and option (d) is correct.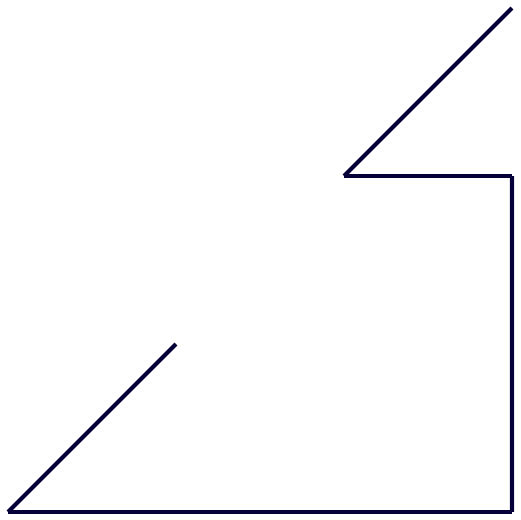
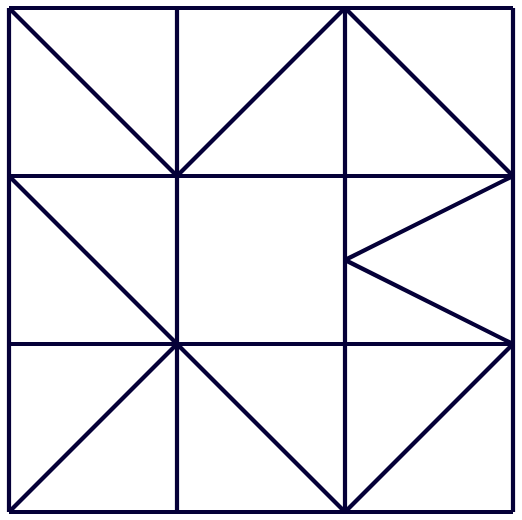
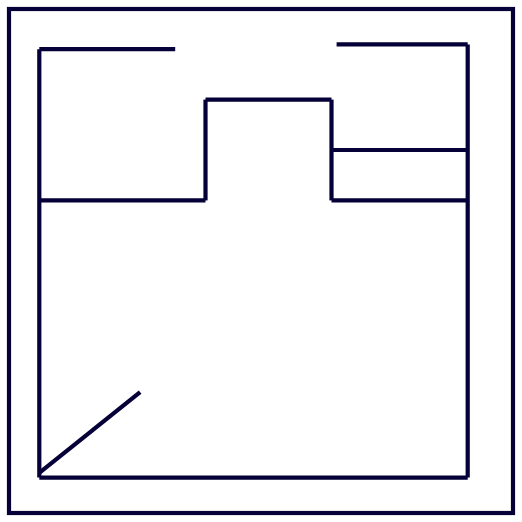
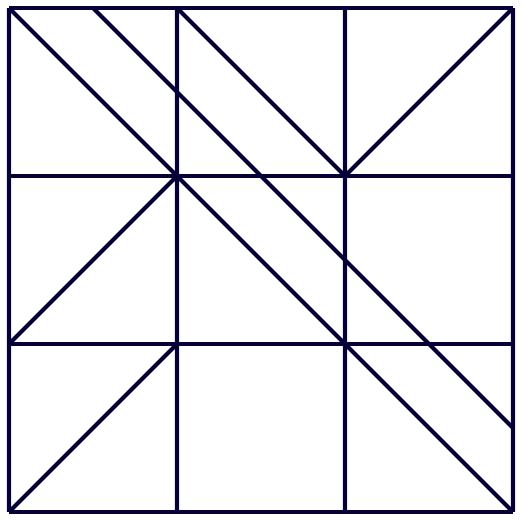
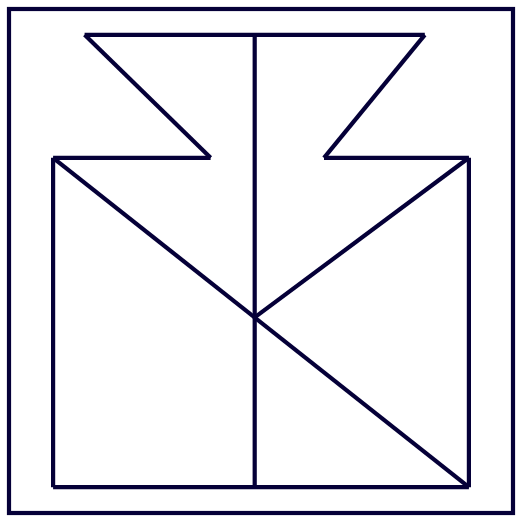
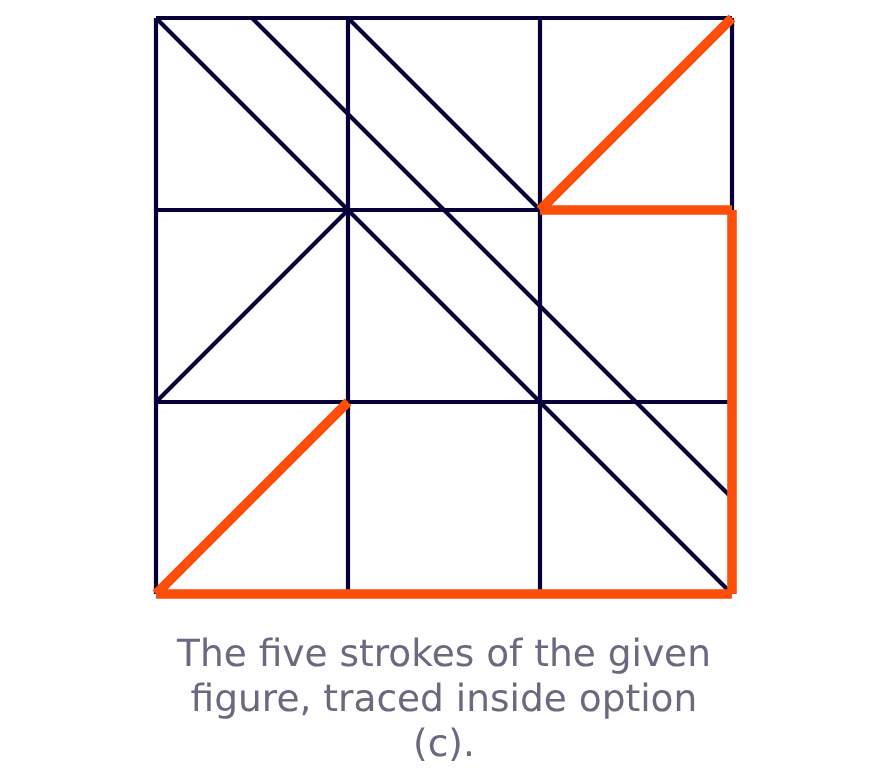 All five strokes are found in option (c) without any rotation, so option (c) is correct.
 Hence the missing term is 133-43=90, so option (b) is correct.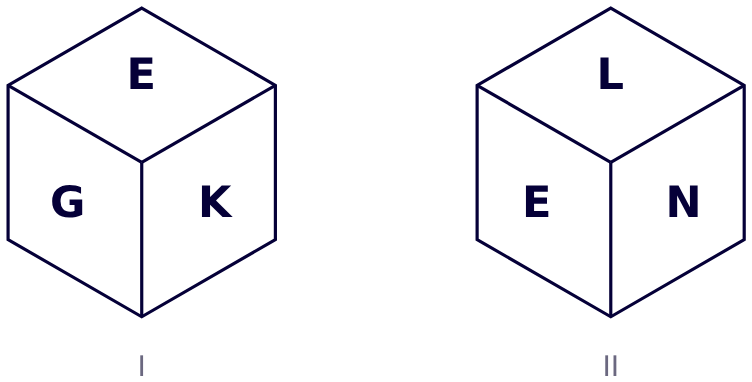
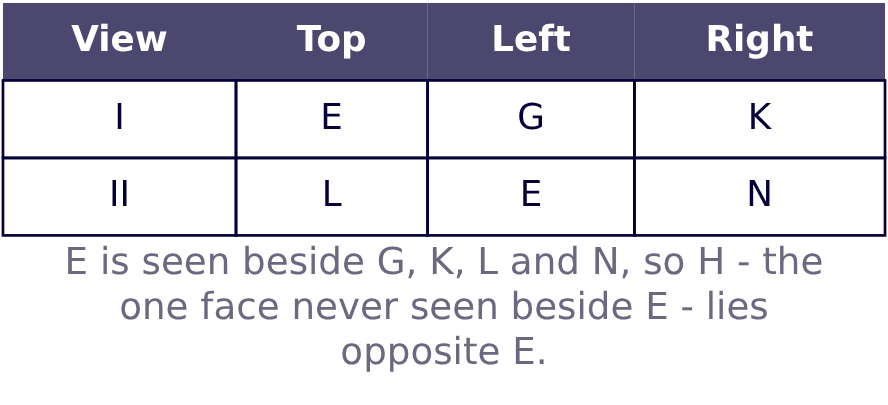 E appears in both views, and in them it is seen touching G, K, L and N - four different faces.
A face on a cube touches four faces and is opposite the fifth, so the only face that can lie opposite E is H, the one face never seen next to it.
The face opposite H is therefore E, so option (a) is correct.
E appears in both views, and in them it is seen touching G, K, L and N - four different faces.
A face on a cube touches four faces and is opposite the fifth, so the only face that can lie opposite E is H, the one face never seen next to it.
The face opposite H is therefore E, so option (a) is correct.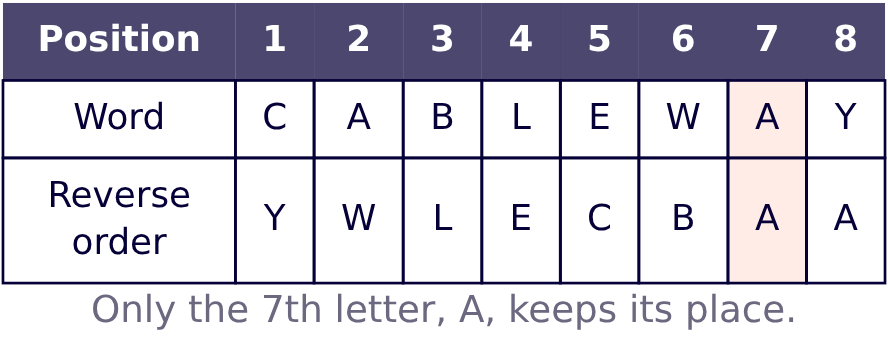 Compare the two rows place by place: C/Y, A/W, B/L, L/E, E/C, W/B, A/A, Y/A.
Only the 7th place holds the same letter A in both rows.
Exactly one letter stays where it was, so option (d) is correct.
Compare the two rows place by place: C/Y, A/W, B/L, L/E, E/C, W/B, A/A, Y/A.
Only the 7th place holds the same letter A in both rows.
Exactly one letter stays where it was, so option (d) is correct.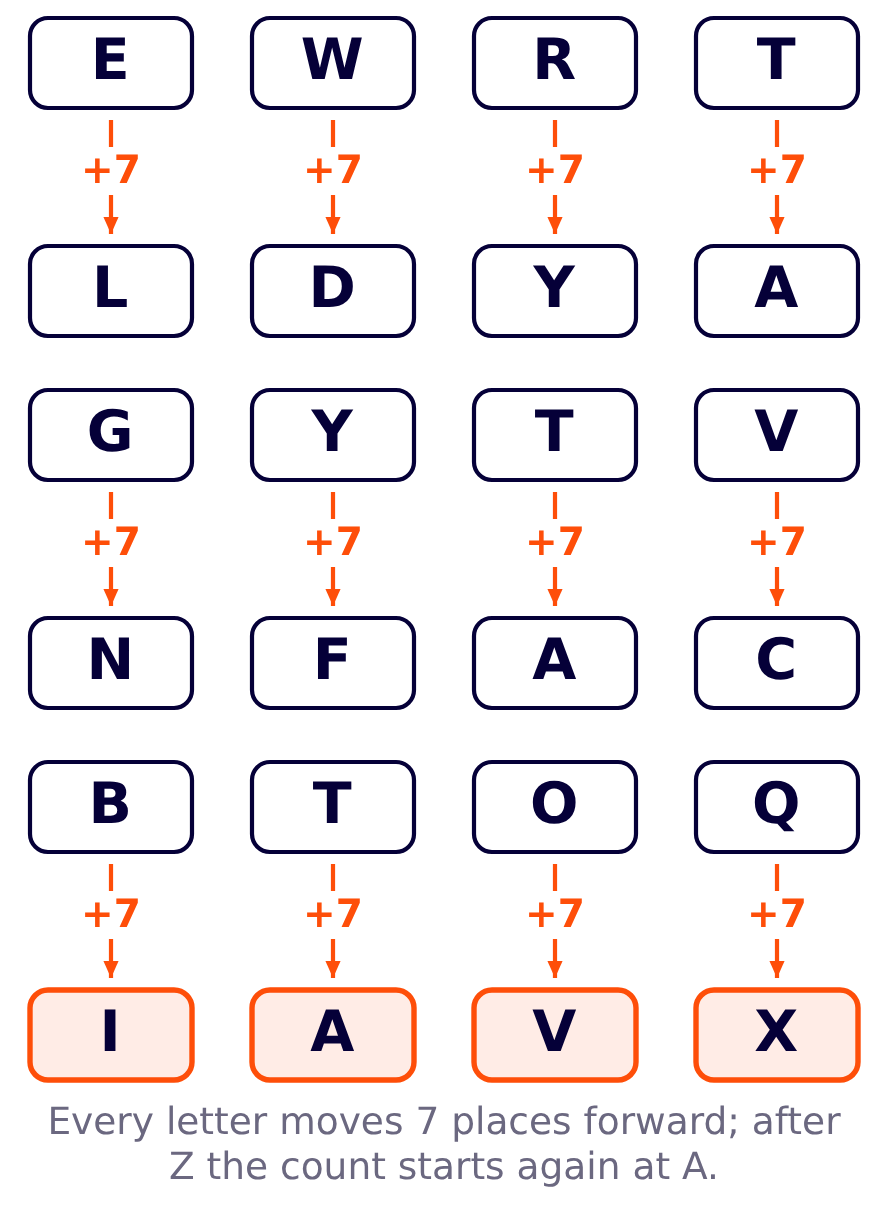 Applying +7 to BTOQ: B(2) → I(9), T(20) → A(1), O(15) → V(22), Q(17) → X(24), that is IAVX, so option (d) is correct.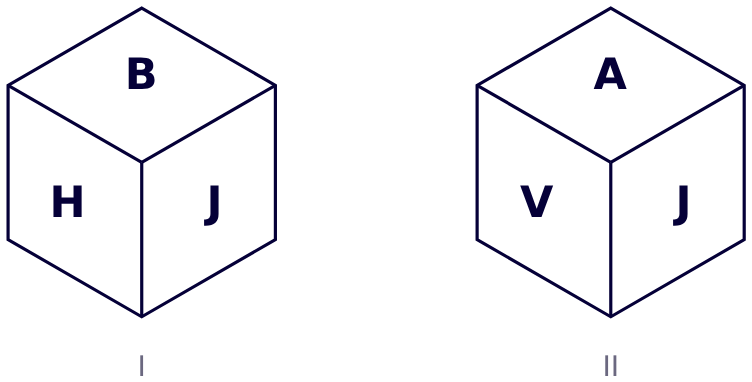
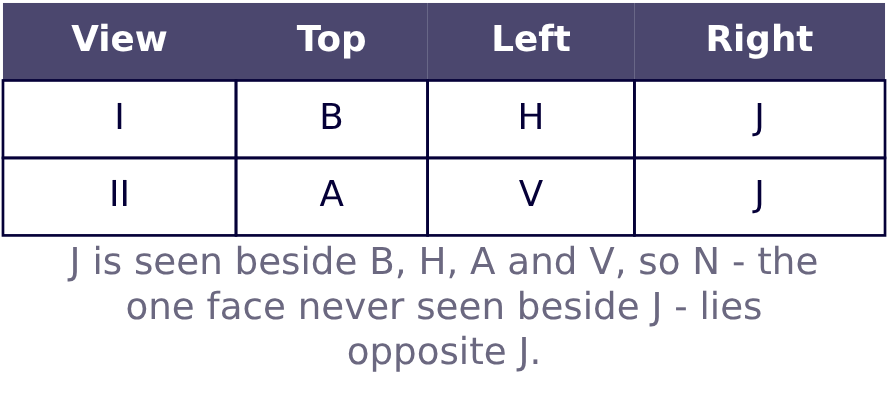 J appears in both views, and in them it is seen touching B, H, A and V - four different faces.
A face touches four faces and is opposite the fifth, so J must lie opposite N, the one face never seen next to it.
The face opposite N is therefore J, so option (d) is correct.
J appears in both views, and in them it is seen touching B, H, A and V - four different faces.
A face touches four faces and is opposite the fifth, so J must lie opposite N, the one face never seen next to it.
The face opposite N is therefore J, so option (d) is correct.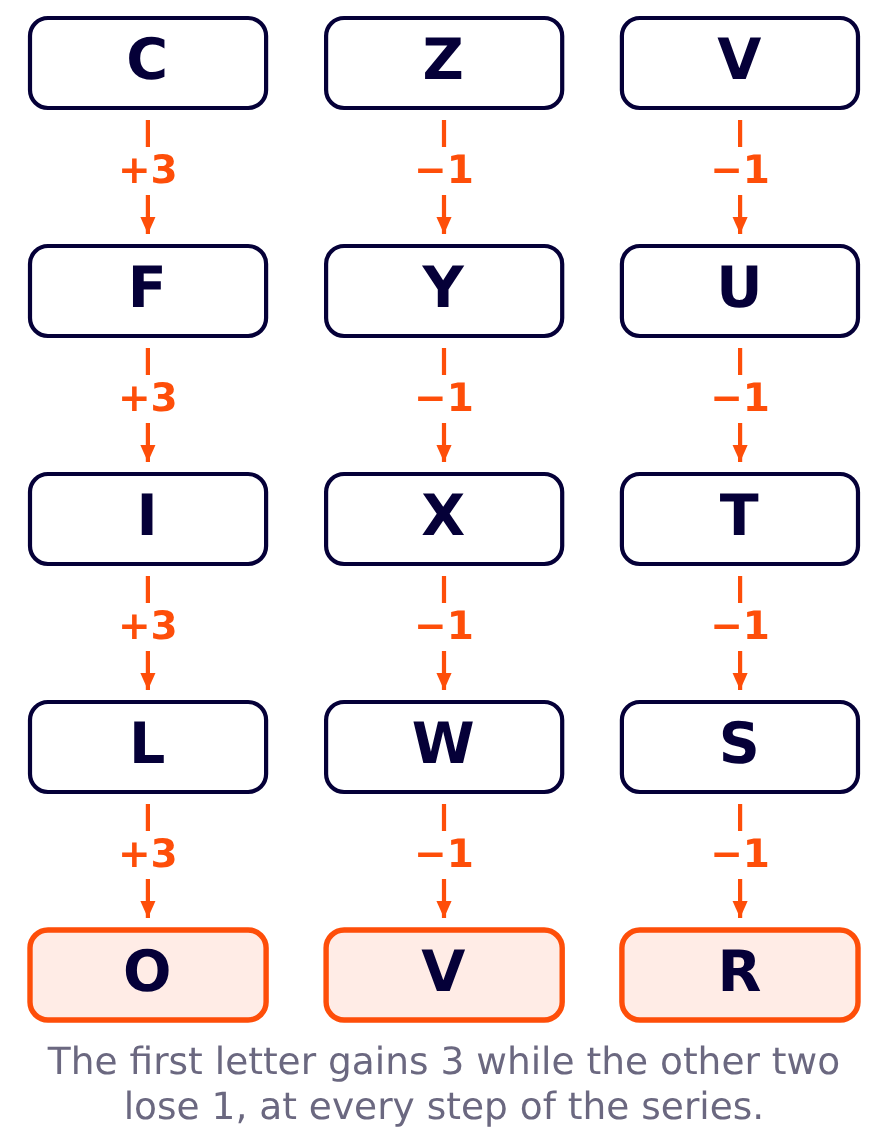 Apply the steps to LWS: L+3=O, W-1=V, S-1=R.
The missing term is OVR, so option (a) is correct.
Apply the steps to LWS: L+3=O, W-1=V, S-1=R.
The missing term is OVR, so option (a) is correct.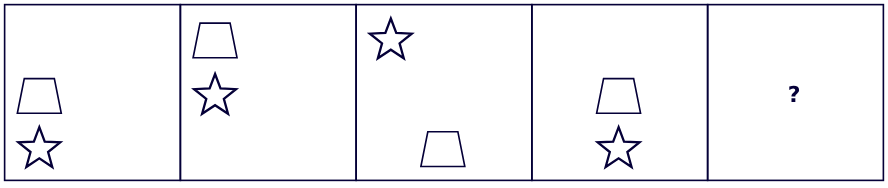
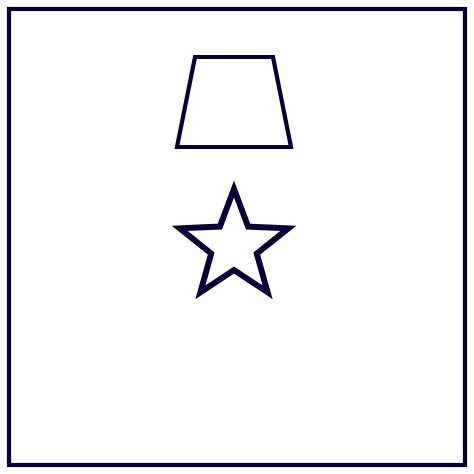
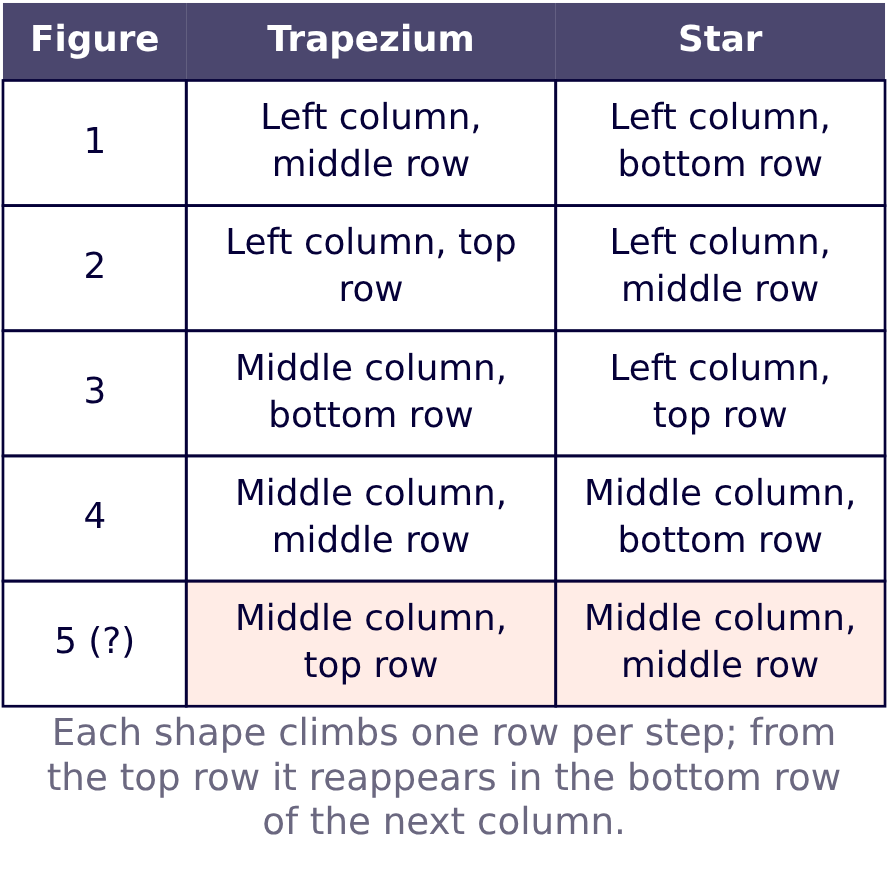 So in figure 5 the trapezium climbs from the middle to the top of the middle column and the star climbs from the bottom to the middle of the same column, one directly below the other.
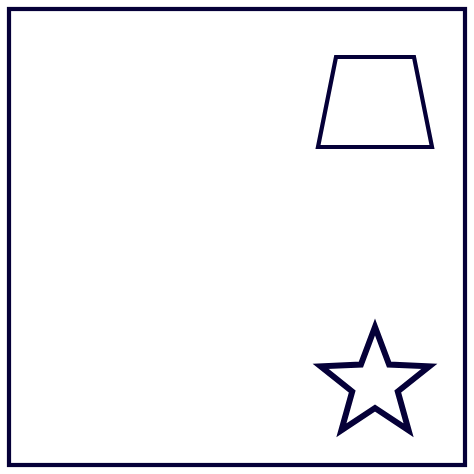
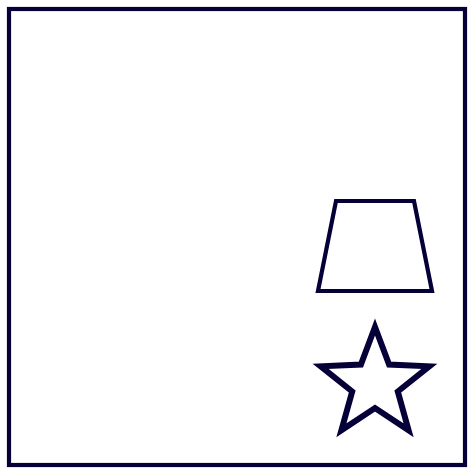
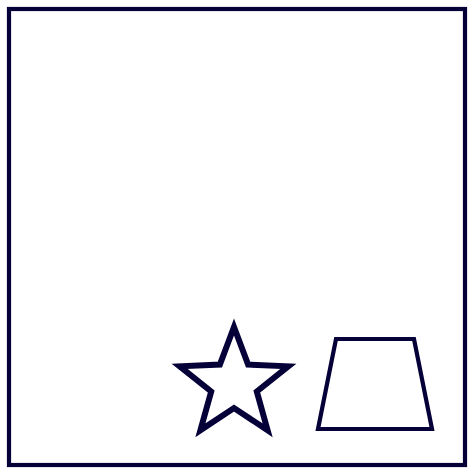
Options (a) and (b) place both shapes in the right-hand column and option (c) puts them side by side along the bottom; only option (d) shows the trapezium in the top row of the middle column with the star just below it in the middle row, so option (d) is correct.
So in figure 5 the trapezium climbs from the middle to the top of the middle column and the star climbs from the bottom to the middle of the same column, one directly below the other.
Options (a) and (b) place both shapes in the right-hand column and option (c) puts them side by side along the bottom; only option (d) shows the trapezium in the top row of the middle column with the star just below it in the middle row, so option (d) is correct.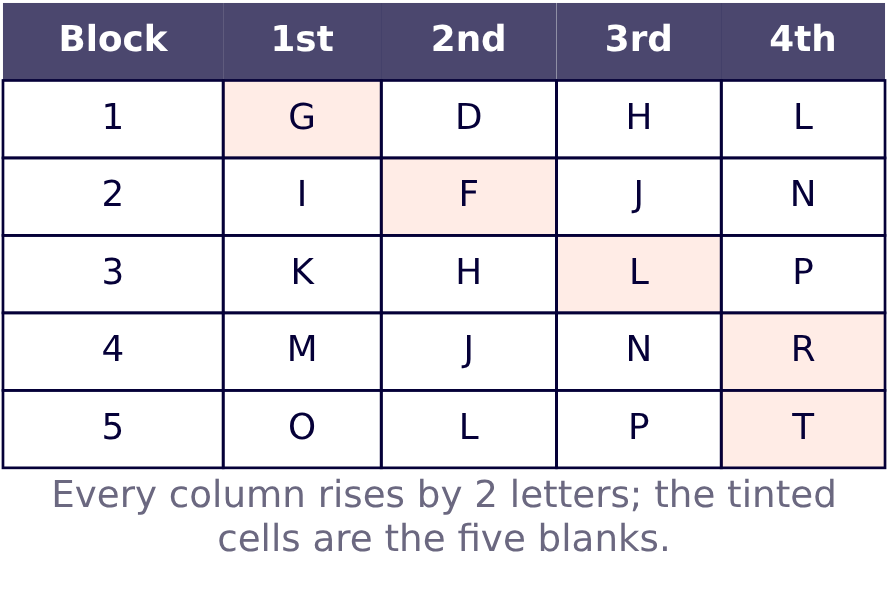 Reading the blanks in order gives G, F, L, R, T, so option (d) is correct.